Key Points:
- Recording voice on your iPhone with the Voice Memo app, opening your app, clicking on our large red button to start, and tapping again to stop.
- Rename your voice recording in Voice Memo. Select the recording you want to rename. The current name recording will be editable per tap. Enter the new name.
- To share the voice recording, use the iPhone’s share standard menu, through which you can share your recording via email, save it in files, and upload it to Google Drive.
As we know, the iPhone 13 is available in the market with powerful features, but one useful feature is that it records high-quality voice, whether it’s your quick thought, a lecture, or a podcast.
But if you are a new iPhone user and want to know how to voice record on an iPhone 13, you must read this article completely.
Voice Memos is such an app which you can use to record your voice. But you are worried that you do not need to download it from Apple App Store, it is already installed in your mobile. .
In this article, we will give you a complete guide using simple words. At the end of this article, you can easily record, edit, and save your voice.
Why Learn How to Voice Record on an iPhone 13?
Various applications allow you to easily record quality audio from voice recording, be it a personal important note or some professional content.
The iPhone 13 comes with the built-in Voice Memos app that allows you to easily record audio.
After you learn the method of voice recording on iPhone 13, creating audio files for various uses is as simple as possible: notes from school or work, so that they are not lost in time and space;
How to Voice Record on an iPhone 13 with the Voice Memos App
Before starting a voice recording on your iPhone 13, you need to ensure the Voice Memos app is properly set up. Luckily, this app comes pre-installed on your phone, so there’s no need to download anything.
Steps to Record Audio on iPhone 13
Here is how to set up the Voice Memos app:
1. Find the Voice Memo App
Go to your iPhone’s home screen, find the Voice Memo app, and click on its icon (waveform and black background).

Note: If you accidentally deleted the app, you can’t find it. Don’t worry, you can download it for free from the Apple app store.
2. Set the position of your iPhone
If you want to record your voice on iPhone 13, first check whether your microphone works properly or if it is blocked, then hold the iPhone as it is during a call.
It is on any flat surface. Place your phone at a distance of 6–8 inches from your face. If you want to record someone else’s voice, keep the phone at a distance of 6–8 inches from them.
Bathe in such a room where there is no background noise. If you cannot avoid the voice, don’t worry; you can remove it later.
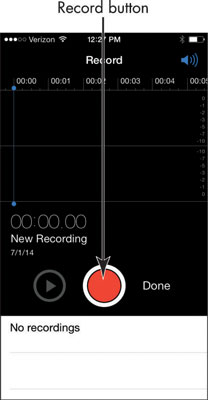
3. Tap the Red Record Button
Once all the requirements are completed, you press the large red button, and your recording starts.
4. Record your voice
Speak clearly and in a reasonable volume. You can adjust the volume level by moving closer or farther the microphone.
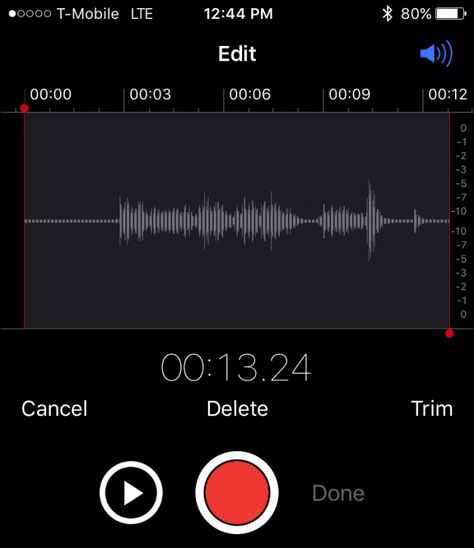
Note: When you are recording via voice memo, you will see an orange dot at the top of your screen, which means you are using the microphone.
5. Pause or stop Recording
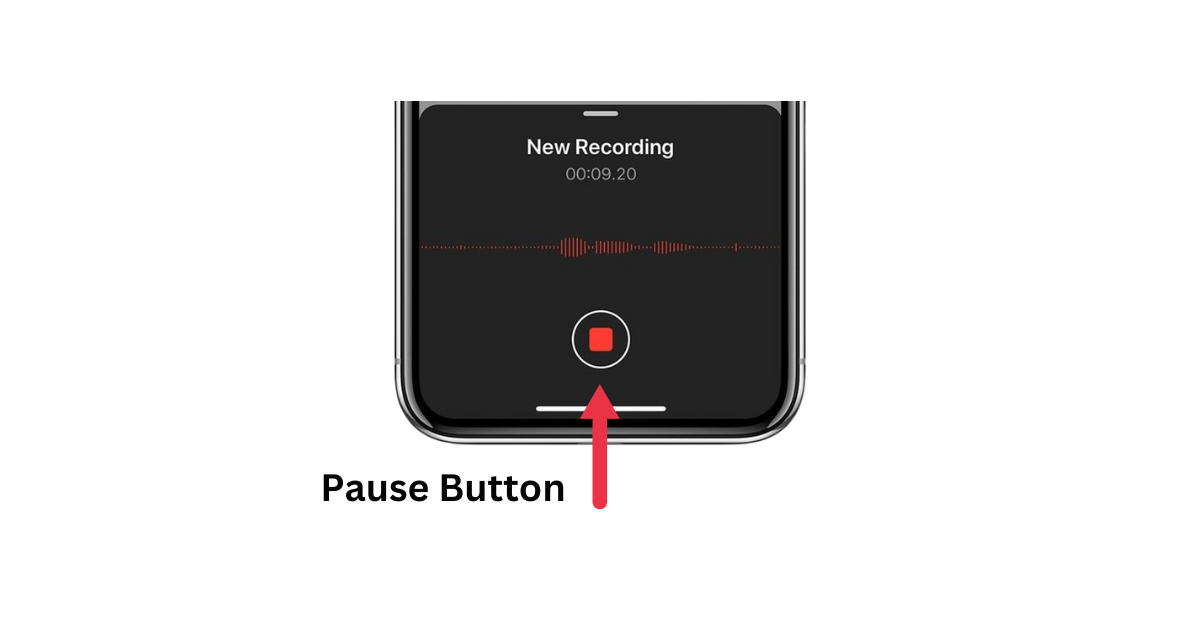
If you want to record your voice in parts, press the pause button and swipe up the waveform to see some advanced features. Press Resume to continue.
6. Save Your Recording
After you stop, the app automatically saves your file under a general name, such as “New Recording.”
Congratulations! You’ve just learned how to voice record on an iPhone 13.
How to Rename and Organize Voice Recordings on an iPhone 13
When you have completed your recording, let’s discuss. How to Rename Voice Recording on iPhone 13.
Steps by Step Guide:
- Open the Voice Memos App.
- View Your Recording: The recording that you made most recently will be displayed at the top of this list.
- Click on Recording name: Click the title you want to edit, and a keyboard will come up allowing you to change it.
- Write the new name: Enter a name that would easily let you recognize your recording.
Organizing voice recordings:
- You can also create folders within the app to put your recordings in different categories: work, personal, school, or whatever you might find pertinent!
How to Edit Voice Recordings on an iPhone 13
One of the amazing features of the iPhone 13 is that you can edit your recordings. The app also makes trimming your audio, i.e. cutting out extra pieces, excess silence, or redundant material, and making some adjustments to the sound levels (or volume), a piece of cake.
Steps to Edit a Recording:
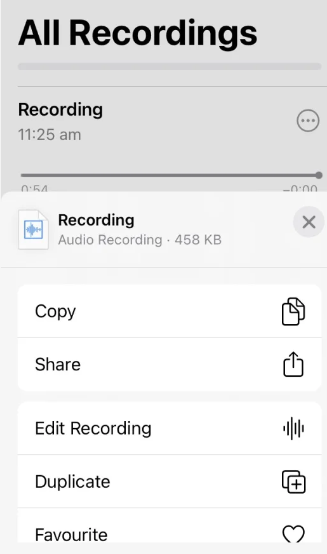
- Choose Your Recording: Launch the Voice Memos app and click on the recording that you want to clip.
- Tap the Three Dots: You will see three dots in the bottom right corner. Tap on them and select Edit Recording.
- Use the Edit Tools:
Trim: For when you want to get rid of unwanted parts.
Replace: You can record over a portion of your audio.
Make Recording: Press the bamboo scroll symbol to earn far better sound quality.
- Save the changes: After making all of your edits, click “Done”.
When you know how to edit voice recordings on an iPhone 13, it can help clean up all files and make them more professional for people attending calls or other meetings regarding work.
How to Share Voice Recordings from iPhone 13
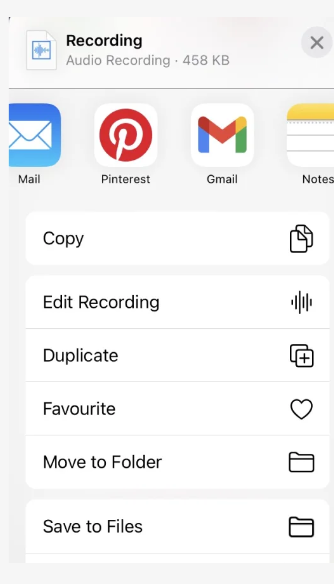
Share a Voice Recording: Steps
- Open Voice Memos: choose which recording you would like to share.
- Select the Share Icon: It’s a square with an arrow sticking out of it.
- Choose How You’d Like to Share the Recording: Decide how you want to send it (email, AirDrop, message app)
The iPhone 13 makes it simple and versatile to share voice recordings.
Once your voice recording is ready, you may want to share it with others. The iPhone 13 makes sharing recordings simple, allowing you to send them via email, text, or other platforms.
How to Use Voice Recordings for Professional Purposes
Well, now you have learned how to record voice on an iPhone 13 and start thinking about professional uses of these recordings. The voice recording tool in the iPhone 13 is widely used for business, including:
- Create podcasts: Record and publish podcast episodes or audio.
- Meeting Notes: Capture the most significant discussions in meetings
- Lectures or Interviews: Write down a recording of interviews, lectures, and presentations for future reference.
How to Improve the Quality of Voice Recordings on iPhone 13
Although the iPhone 13 already comes with advanced microphones, there are a few ways to boost your work phone audio quality, especially when recorded sounds come from surroundings with noise.
Tips to Create Higher Quality Voice Recordings:
- Find a quiet location: noise in the background can impact your audio. Record somewhere with no noise.
- A Microphone: Recording from an external microphone can improve your voice quality and clearness.
- Keep the iPhone steady: if you keep your iPhone steady, it will also avoid handling noise being picked up
Using these easy steps, you can ensure that the voice recordings on an iPhone 13 sound better.
How to Delete Voice Recordings on iPhone 13
Deleting a recording is just as easy, and almost simple.
Steps to Delete a Recording:
- Finding recordings on Voice Memos: Open the app and find a specific recording you want to delete
- Swipe Left: Swipe left over the recording you would like to delete.
- Tap Delete: This time, tap Delete, then confirm to delete by tapping the delete button.
Afterwards, the recording will be deleted from your iPhone 13. If you delete a recording by mistake, it can be backed up from the “Recently Deleted” folder.
Mute the Start and Stop Tones
- Go to the Voice Memo app.
- Click on large red button to start recording.
- While the recording starts, use the volume down button to mute the volume.
How to use another app while recording
While recording voice, you can also use it without knowing it, but only until the audio is playing.
- Open your Voice Memo app
- Click on the Red button to start recording.
- While recording, you go to the Home screen and open another app.
If another app starts your audio, your voice recording will stop.
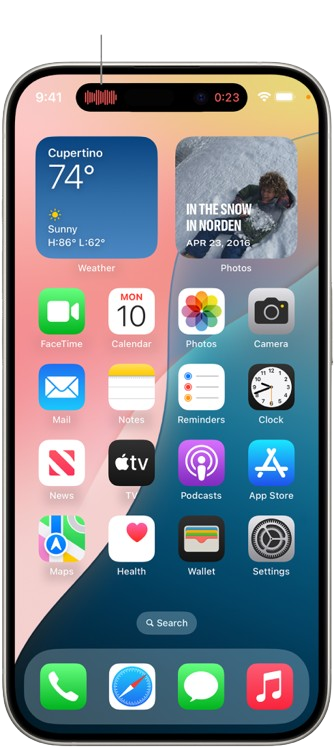
Recording app is visible at the top of the screen in Dynamic Island. Click on it to go back.
How to voice record on an iPhone 13 in stereo in Voice Memos
If you want to record your voice using multiple microphones, try using the stereo method.
You can use the stereo option to record your voice using different microphones. If you listen to your recording through your headphones, you hear different sounds from different microphones. However, the waveform display still looks the same.
NOTE: Stereo recording is not available on all devices.
FAQs: How to Voice Record on an iPhone 13
1. Can I record phone calls using Voice Memos on iPhone 13?
No, the Voice Memos app on iPhone does not allow you to record phone calls due to privacy concerns.
2. Where are voice recordings saved on iPhone 13?
Voice recordings are saved within the Voice Memos app and are also backed up to iCloud if you have enabled iCloud backup.
3. Can I convert voice recordings to text on iPhone 13?
Currently, the iPhone does not have a built-in transcription feature, but you can use third-party apps like Otter.ai to convert voice recordings into text.
4. Is there a time limit for voice recordings on iPhone 13?
No, there is no strict time limit for recording, but your iPhone’s storage space will determine how long you can record.
5. How do I backup my voice recordings on iPhone 13?
Your voice recordings can be automatically backed up to iCloud if you have iCloud enabled. You can also manually export them to your computer or a cloud service.
Conclusion: How to Voice Record on an iPhone 13
Learning how to voice record on an iPhone 13 is a simple process but of course, a useful skill. The Voice Memos app is perfect for everything from recording thoughts on the go-to audio for personal notes, professional content that you are making, or creative projects.
The iPhone 13 is an editing tool used to organize and share recordings for any recording person who needs to capture sound.
After reading this article, you are all set to record anything on your iPhone 13.
