The timer feature on the iPhone camera is a handy tool that allows you to take pictures without having to press the shutter button. Whether you’re taking a selfie, group photo, or capturing a scene from a distance, the timer can help you get the perfect shot.
In this guide, we will explore where is the timer on iPhone camera and how you can effectively use it for your photography.

Understanding Where is Timer on iPhone Camera
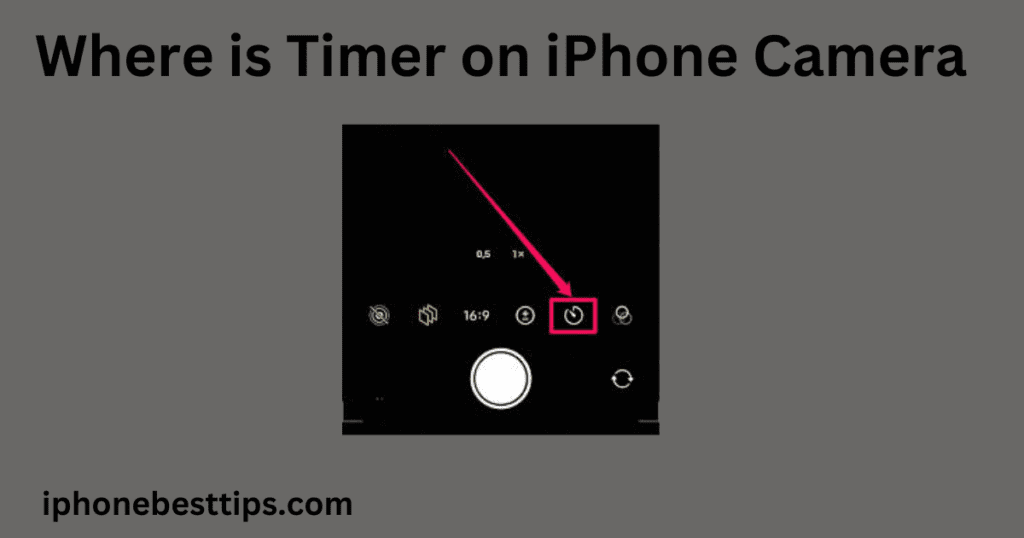
If you’ve been wondering, where is the timer on iPhone camera, you’re not alone. Apple includes this feature on most iPhone models, but it’s not immediately obvious where to find it.
The camera timer allows you to delay the shutter, giving you time to position yourself or prepare the scene before the photo is taken.
How to Find the Timer on iPhone Camera
To locate where is the timer on iPhone camera, follow these simple steps:
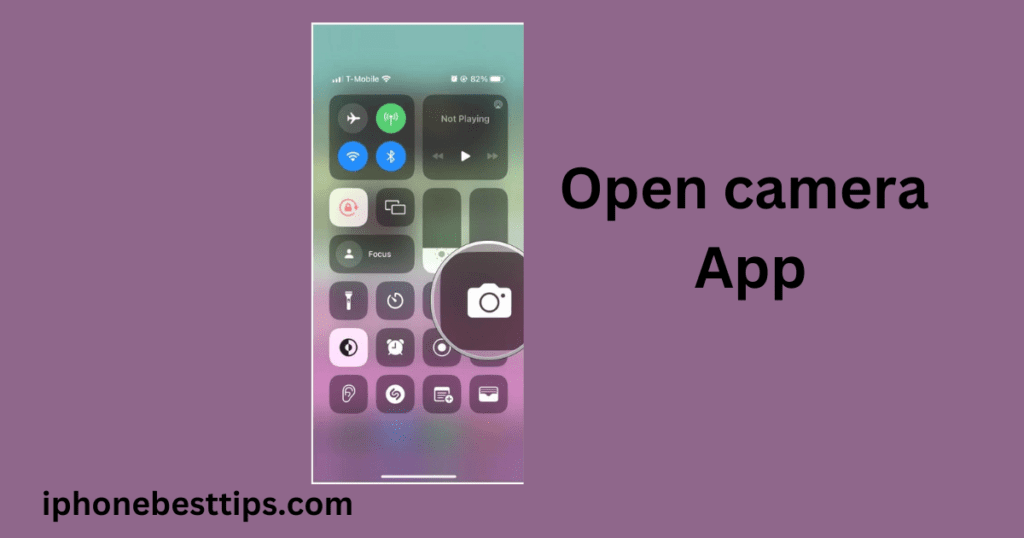
Open the Camera App: On your iPhone, open the default Camera app from your home screen.

Switch to Photo Mode: Ensure that you’re in “Photo” mode, as the timer is not available in all camera modes, such as video or slow-motion.
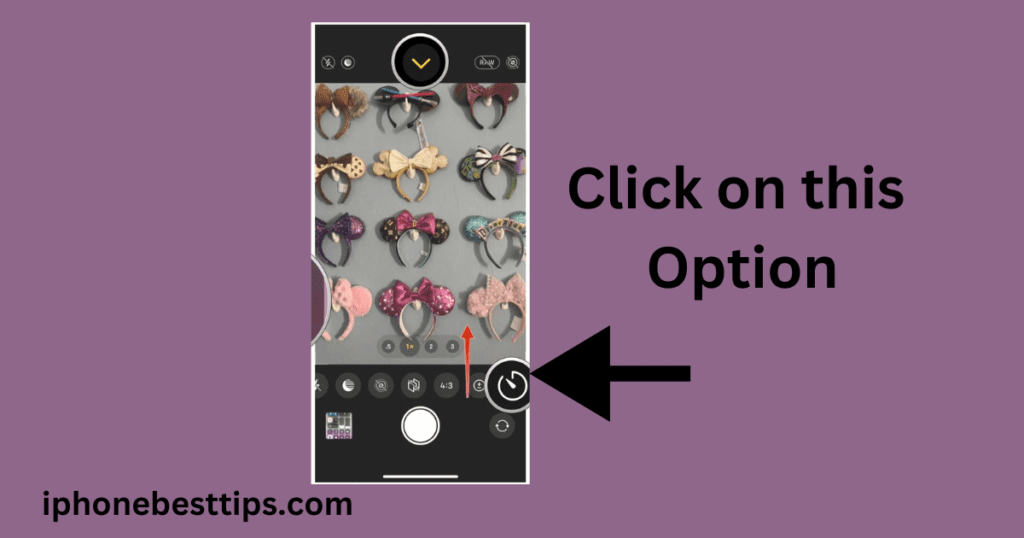
Look for the Timer Icon: The timer icon, represented by a clock, is located at the top of your screen. If you can’t see it, tap the upward-facing arrow at the top to reveal more camera options.

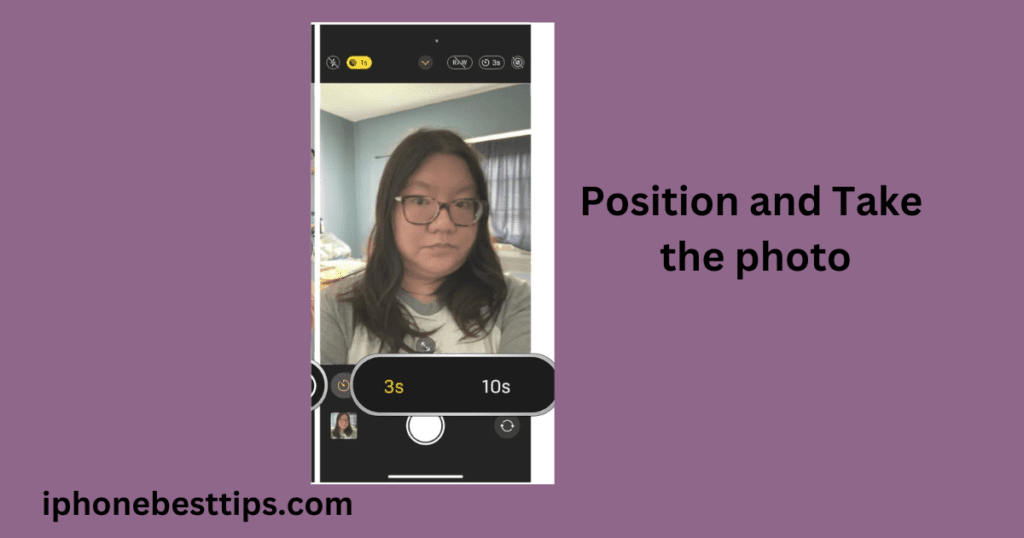
Select Timer: Tap the timer icon and choose between the options – 3 seconds or 10 seconds delay.

Position and Take the Photo: After selecting the timer duration, press the shutter button and the countdown will begin. You’ll see a visual countdown on the screen as the timer counts down.
Where is the Timer on iPhone Camera for Different Models?
The location of the camera timer may slightly vary depending on your iPhone model and iOS version. Let’s break it down for a few different iPhone models to help you find where is the timer on iPhone camera more easily:
iPhone 11, iPhone 12, and iPhone 13 Models
If you’re using an iPhone 11, iPhone 12, or iPhone 13 series, finding the timer is simple. Follow the steps mentioned above, and make sure to swipe up to reveal the hidden camera options, including the timer.
iPhone X and Older Models
For iPhone X and older models, the timer on iPhone camera is usually found in the same location, but if you are running an older iOS version, the interface may look different. If you can’t find the timer, updating your iOS may help.
Why Use the Timer on iPhone Camera?
Now that you know where is the timer on iPhone camera, you might be wondering, why should you use it? Here are some common reasons:
- Group Photos: The camera timer allows you to set up your iPhone and join in group photos without needing someone to press the shutter.
- Stabilized Shots: For sharper, blur-free photos, using the timer reduces camera shake that can happen when pressing the shutter button.
- Creative Photography: It’s perfect for creative photography, such as long exposure shots or capturing the perfect jump shot.
- Hands-Free Selfies: If you want a selfie but don’t have anyone to take it for you, the timer is your best friend.
How to Use Timer with Burst Mode on iPhone Camera
Many people are curious if they can combine the timer with burst mode on the iPhone. Unfortunately, as of iOS 14 and later, the two features cannot be used simultaneously. However, the timer can still help you capture the right moment by giving you enough time to get into position.
How to Turn Off Timer on iPhone Camera?
If you’ve set the timer and want to disable it, here’s how to turn it off:
- Open the Camera App: Once again, launch the Camera app on your iPhone.
- Tap the Timer Icon: Just like you selected the timer, tap the same icon at the top of the screen.
- Select Off: Instead of choosing a delay, select “Off” to disable the timer.
Best Practices for Using the Timer on iPhone Camera
Now that you know where is the timer on iPhone camera, let’s explore some tips and best practices to make the most of this feature:
1. Use a Tripod
A tripod ensures that your iPhone remains steady when using the timer, especially if you’re shooting in low light or trying to capture long-exposure shots.
2. Use the 10-Second Timer for Group Photos
If you’re taking a group photo, the 10-second timer is ideal as it provides ample time for everyone to get into position and prepare for the shot.
3. Use the 3-Second Timer for Selfies
For selfies, the 3-second timer is usually enough time to frame the shot without leaving you waiting too long.
4. Combine Timer with HDR for Best Results
If you’re shooting outdoors in bright sunlight, combine the timer with HDR (High Dynamic Range) for the best quality photos. HDR helps to balance the exposure, ensuring the image isn’t too dark or too bright.
Common Questions about Where is Timer on iPhone Camera
FAQ 1: Can I use the timer on iPhone camera for videos?
No, the timer feature is only available for taking photos. You cannot use it for recording videos.
FAQ 2: Can I adjust the timer duration beyond 10 seconds?
Currently, the iPhone camera offers only two options: 3 seconds and 10 seconds. You cannot customize the timer duration beyond these settings.
FAQ 3: Does the timer work with all iPhone camera modes?
The timer works with most camera modes, including Photo, Portrait, and Square. However, it is not available in Video, Time-lapse, or Slo-Mo modes.
Related Article about iPhone camera timer: How to set a repeating timer on iPhone
Creative Uses for Timer on iPhone Camera
Using the timer on iPhone camera isn’t just limited to basic photography. You can get creative and use it in various scenarios:
1. Long Exposure Shots
For those interested in capturing long-exposure shots, such as flowing water or light trails, combining the timer with the iPhone’s “Live Photos” feature can create a smooth effect without camera shake.
2. Action Shots
Want to capture the perfect action shot, like jumping in the air? Set the timer for 10 seconds, give yourself enough time to leap, and let the camera do the rest.
3. Candid Photography
If you want to take a natural-looking photo without anyone knowing when the picture will be taken, set the timer and place your phone in a subtle spot. This method is perfect for candid shots.
Where is the Timer on iPhone Camera: Exploring Alternatives
If you don’t want to use the built-in timer, there are third-party apps available on the App Store that offer more customizable options. Some apps even allow you to set longer or shorter delays, or trigger the camera using a sound or motion.
Conclusion: Where is Timer on iPhone Camera and Why It Matters
The iPhone camera is known for its advanced features, and the timer is one of the most useful tools for both everyday and creative photography. Knowing where is the timer on iPhone camera and how to use it effectively can make a big difference in the quality of your photos.
Whether you’re taking a simple group photo or trying something creative like long-exposure shots, the timer gives you the flexibility to capture the perfect moment. Don’t forget to experiment with different timer settings and camera modes to get the best results.
By understanding where is timer on iPhone camera, you’re equipped to take your iPhone photography to the next level.
This blog provides a complete overview of where is timer on iPhone camera, and I hope it helps you use the feature with confidence. Feel free to share your own tips or experiences with the iPhone camera timer in the comments below
